
If you're an Apple user, you've undoubtedly encountered one or more than one problem when using the App Store app to purchase and download apps. Do you meet a message saying "Account Not In This Store" on your iPhone or iPad? This message always pops up when there is an issue in the App Store. In the Apple Community, "Account Not In This Store" is cited by Apple users complaining of not being able to purchase and download apps in the App Store. If you have the same problem, you are in the right place. Here's a closer look at how to fix Account Not In This Store, along with a quick way to unlink Apple ID from iPhone without password.
- Part 1. What Does Account Not In This Store Mean?
- Part 2. How to Bypass Account Not In This Store by Changing Region
- Part 3. How to Fix Account Not In This Store after Changing Region
- Solution 1. Force Restart iPhone
- Solution 2. Sign Out and Back into App Store
- Solution 3. Change Password for Apple ID
- Solution 4. Update and Verify Payment Method
- Solution 5. Disable Content Restrictions
- Solution 6. Create a New Apple ID for the Required Region
- Solution 7. Use Family Sharing to Access Region-locked Apps
- Solution 8. Use a VPN Network to Change Location
- Solution 9. Update System Software and App Store
- Solution 10. Reset Network Settings
- Solution 11. Contact Apple Support
- Part 4. Bonus Tip: Unlink Apple ID from iPhone without Password
- Part 5. Conclusion
Part 1. What Does Account Not In This Store Mean?
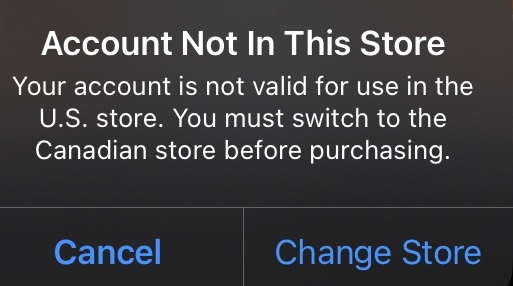
The message says: "Account Not In This Store. Your account is not valid for use in the store. You must switch to the store before purchasing", which prevents Apple users from purchasing and downloading apps in the App Store. In other words, you cannot purchase, download, and update apps in the App Store on your iPhone, iPad, or other Apple devices.
The primary reason for this error is a mismatch between your Apple ID's country settings and the App Store region. Here are the most common causes:
- Apple ID set to a different country than the App Store currently in use.
- App unavailable in your current region or country.
- Changed App Store region without updating Apple ID settings.
- Using multiple Apple IDs on one device.
- Device restored from a backup linked to another region.
- iCloud region changed to a different billing address.
For whatever reason, you can remove the message - your account is not valid in this store while trying to download or update apps on your iPhone or iPad. The following are solutions to resolve the issue, and go on reading to find the answer.
Part 2. How to Fix Account Not In This Store by Changing Region
To fix Account Not In This Store, the straightforward way is to change your country or region. This can be done on any Apple device, including the iPhone and Mac. You can also change it online. But before changing your country or region, you need to spend your store credit, cancel your subscription and get a payment method for your new country or region.
Make Preparation for Changing Your Country or Region
1. Check your Apple account balance. If you have a balance, spend any balance remaining on your Apple ID.
2. Check your subscription on Apple ID. If you have subscribed to any service, cancel your subscription in advance.
3. Check your order on your Apple ID. If you have any memberships, pre-orders, movie rentals, or others, go to deal with it in advance.
4. Get a payment method for your new country or region. Make sure that you have a valid payment method for your new country or region.
5. Download all your previous contents. If you want to continue to use apps or others in the future, re-download your apps, music, movies, TV shows, and books on your device.
Option 1. Change Your Region on Your iPhone or iPad

Step 1. Go to Settings and tap your name, then select Media & Purchases.
Step 2. Tap View Account and enter your Apple ID and password to sign in.
Step 3. Under Account Settings, select Country/Region and tap Change Country or Region.
Step 4. Select the country or region you're in, then review the Term & Conditions.
Step 5. Tap Agree in the upper-right corner, then tap Agree again to confirm.
Step 6. Select a payment method and enter your new payment information and billing address, then tap Next.
Option 2. Change Your Region on Mac
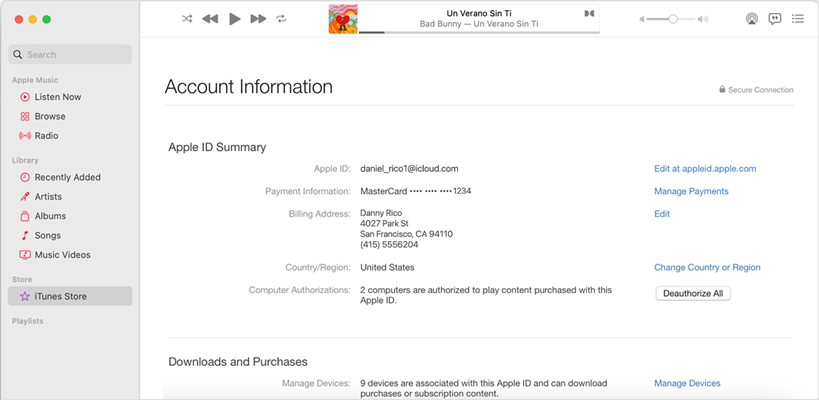
Step 1. Open the Apple Music app or Apple TV app.
Step 2. Click Account > Account Settings in the menu bar.
Step 3. Enter your Apple ID and password to sign in.
Step 4. On the Account Information page, click Change Country or Region.
Step 5. Select the country or region you live in, then review the Terms & Conditions.
Step 6. Click Agree, then click Agree again to confirm.
Step 7. Enter your new payment information and billing address, then click Continue.
Option 3. Change Your Region on Windows PC
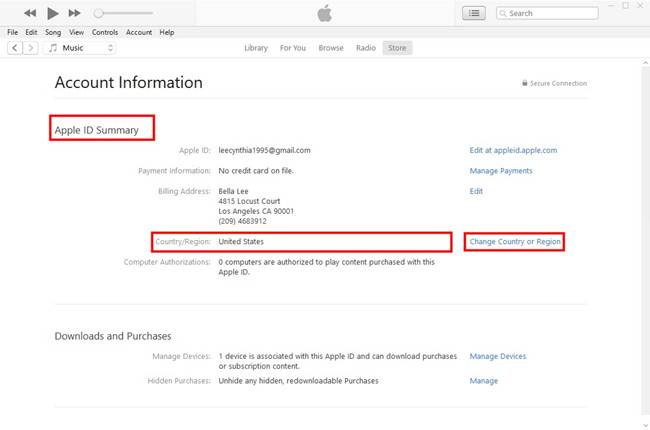
Step 1. Launch iTunes and click Account > View My Account from the menu bar.
Step 2. On the Account Settings page, click Change Country or Region.
Step 3. Browse and select your new country or region.
Step 4. Review the Terms & Conditions, then click Agree twice.
Step 5. Input your new payment information and billing address, then click Continue.
Option 4. Change Your Region Online
Step 1. Visit appleid.apple.com and sign into with your Apple ID and password.
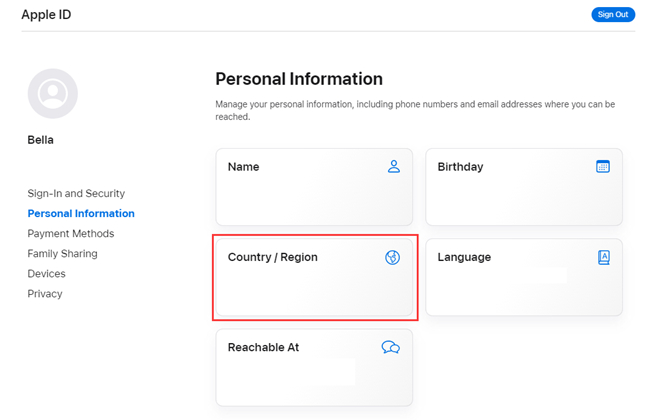
Step 2. Click Personal Information on the left sidebar and select Country/Region.
Step 3. In the pop-up window, click Change country or region to update your Apple ID information.
Step 4. Select a new country or region and update your payment method and billing address, then click Update.
Note:
If you are a part of a Family Sharing group, you might not be able to change your country or region. In this case, only the organizer of Family Sharing can change the Apple ID information.
Part 3. How to Fix Account Not In This Store after Changing Region
If a changing country or region is not working for you, you can try other methods to fix the problem. Here are some possible ways to help you fix your Account Not In This Store problem.
Solution 1. Force Restart iPhone
A simple restarting can resolve most of issues related to your iPhone. When you receive the prompt - Account Not In This Store, you can try restarting your iPhone. Then you can download and purchase apps in the App Store and check whether the issue still exists.
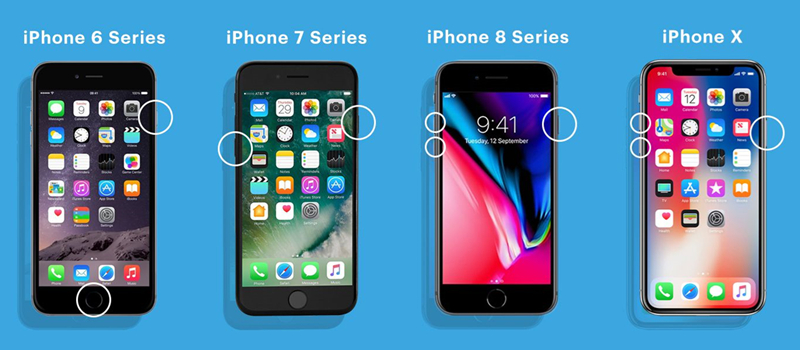
Step 1. Press and hold the volume down and power button until the power-off slider shows.
Step 2. Drag the slider, then wait 30 seconds for your device to turn off.
Step 3. Turn it back on by pressing and holding the power button.
Solution 2. Sign Out and Back into App Store
When there is an error with your Apple ID, signing out of and back into the App Store is a simple way to fix this issue. To fix Account Not In This Store, you can try signing out of the App Store on your iPhone, then sign into the App Store app again.
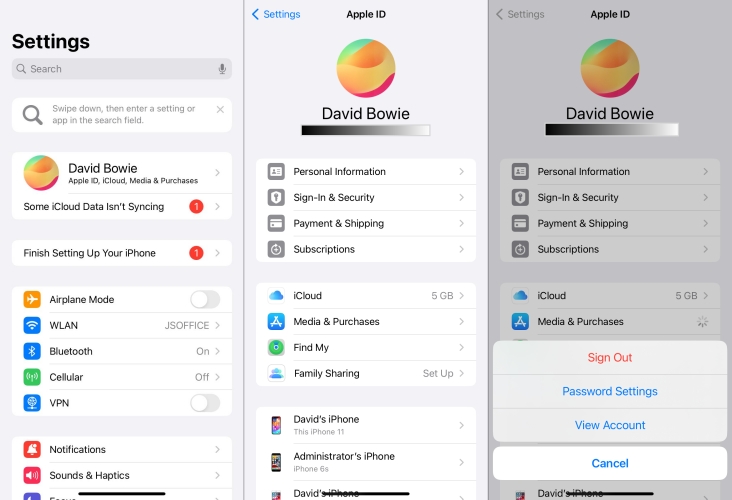
Step 1. Head to Settings and tap your Apple ID profile, then select Media & Purchases.
Step 2. In the pop-up window, tap Sign Out and tap it again to confirm.
Step 3. After signing out of your Apple ID, go to sign into again.
Solution 3. Change Password for Apple ID
For the most part, the password would affect the use of Apple ID if you're not using the service longer than 30 days at a time, in a location which is associated with your Apple ID. Then you can try to change Apple ID password for fixing this issue.
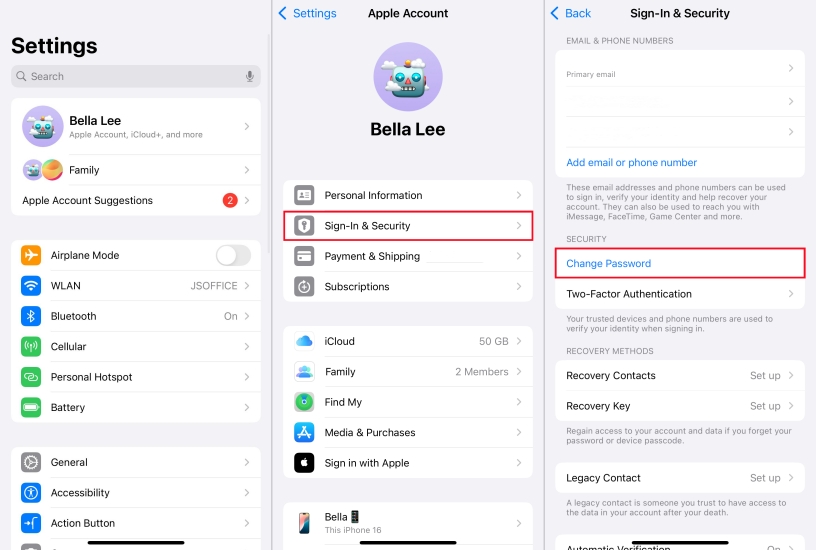
Step 1. Open the Settings app on your iPhone and tap your Apple ID name.
Step 2. Tap Sign-In & Security and select Change Password.
Step 3. Enter your current password, then enter a new password twice.
Solution 4. Update and Verify Payment Method
After checking your account's regional settings, you need to make sure your payment methods are up-to-date and valid for your current region. This includes updating your billing address and payment details. Also, if your current payment method is not accepted, you will need to add a new one that is.
Option 1. Update the Payment Method on the iPhone
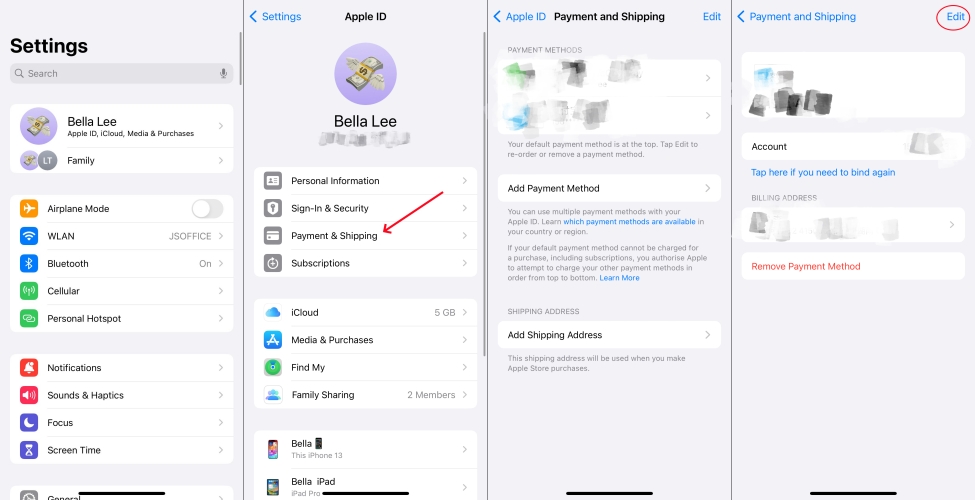
Step 1. Open the Settings app, then tap your Apple ID name > Payment & Shipping.
Step 2. Sign in with Face ID or Touch ID and browse your payment method.
Step 3. Select a payment method to update and tap Edit.
Step 4. Enter your new billing information and tap Done.
Option 2. Change the Payment Method on the iPhone
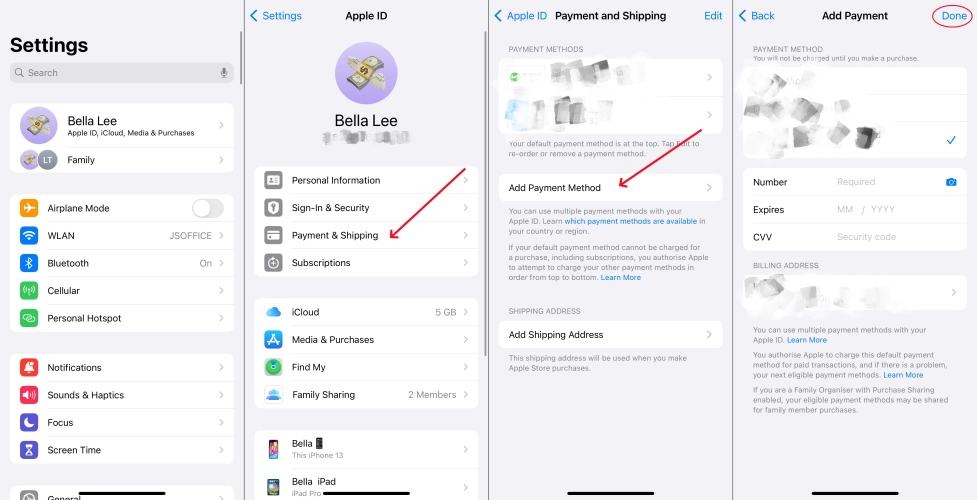
Step 1. In the Settings app, tap your Apple ID name and select Payment & Shipping.
Step 2. Sign in with Face ID or Touch ID, then tap Add Payment Method.
Step 3. Enter the new payment method and tap Done.
Step 4. Tap Edit, then tap the red delete button next to the unuseful method.
Step 5. Tap Remove to confirm.
Solution 5. Disable Content Restrictions
When you enable Content & Privacy Restrictions on your iPhone, you have to check whether you have restricted the allowed store content. The Content & Privacy Restrictions in Screen Time will prevent you from downloading apps in the App Store.
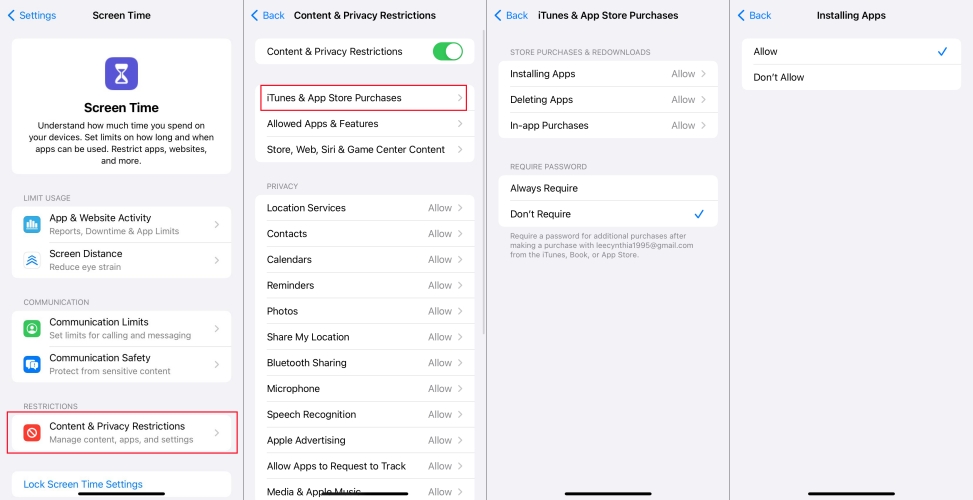
Step 1. Locate Settings on your iPhone and tap Screen Time.
Step 2. Under Screen Time, tap Content & Privacy Restrictions.
Step 3. Tap iTunes & App Store Purchases.
Step 4. Select Allow in Installing Apps and In-app Purchases.
Solution 6. Create a New Apple ID for the Required Region
If you frequently need apps from another country or region, creating a second Apple ID might be the best solution. By creating a new Apple ID for the required region, you can switch your Apple ID in the App Store to the required one, then you easily download and install apps. This can help you bypass the error, but cannot resolve it.
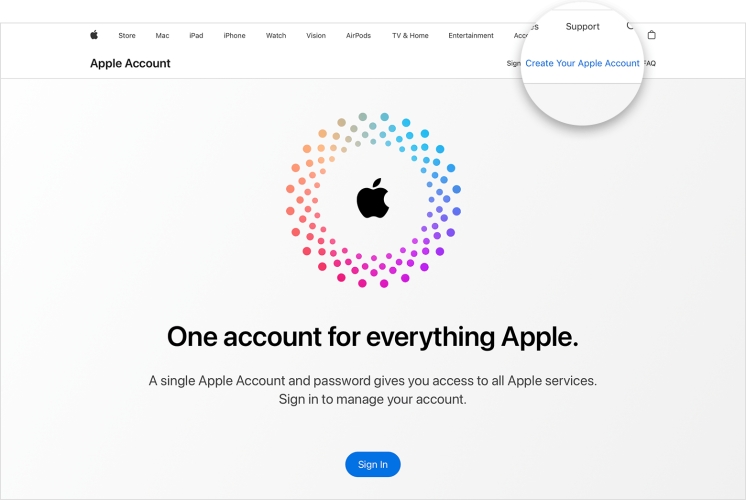
Step 1. Go to Apple's ID website and create a new Apple ID with an email.
Step 2. Choose the desired country or region when prompted.
Step 3. Skip adding a payment method if possible.
Step 4. Sign in to the App Store with this new Apple ID to access region-restricted apps.
Solution 7. Use Family Sharing to Access Region-locked Apps
When you travel to a foreign country, you will encounter the "Account Not In This Store" error. In this case, you can use Apple's Family Sharing features to get purchases across accounts. If you are a part of a Family Sharing group, you can access region-locked apps when the family organizer is in the required country or region. So, you can ask the family organizer to add your Apple ID to the family group.
Step 1. Navigate to Settings > Family on the family organizer's iPhone.
Step 2. Add the add people icon in the upper-right corner.
Step 3. Tap Invite Others to add your Apple ID, then accept the invitation.
Step 4. Open the App Store and tap your profile picture at the top of the screen.
Step 5. Tap your family member's name to see the purchases.
Step 6. Tap Download next to an item to download.
Solution 8. Use a VPN Network to Change Location
Some apps are region-restricted and may not be available in your country. A VPN can help you access region-locked content. This method works when you want to download some apps not available in your region. However, this is not a permanent solution and might violate the App Store's terms of service because Apple restricts VPN-based downloads. And you will the same issue again when you want to update the app in the App Store.
Solution 9. Update System Software and App Store
Sometimes, the outdated version of system software and app store can affect your account. When the system software and App Store on your iPhone are not updated to the latest version, you can go to update them to fix the issue. It's easy to update the system software and App Store by following the steps below.
Update the System Software
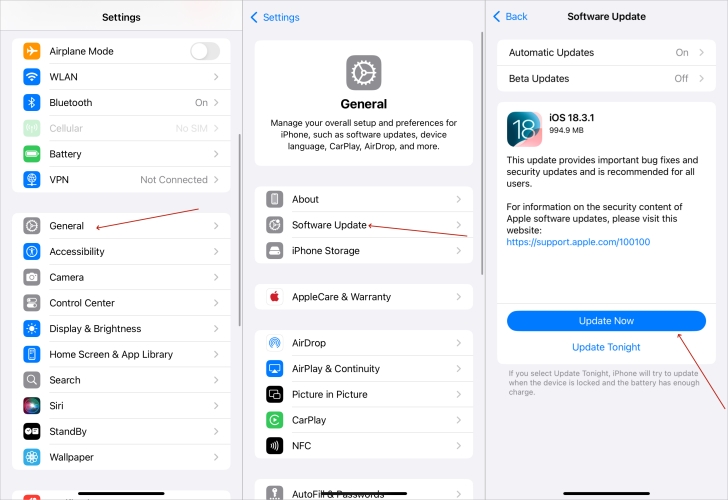
Step 1. Go to Settings > General and tap System Update.
Step 2. Find an update available to update, then tap Download and Install.
Step 3. Enter your screen lock passcode and tap Install Now to update your iPhone.
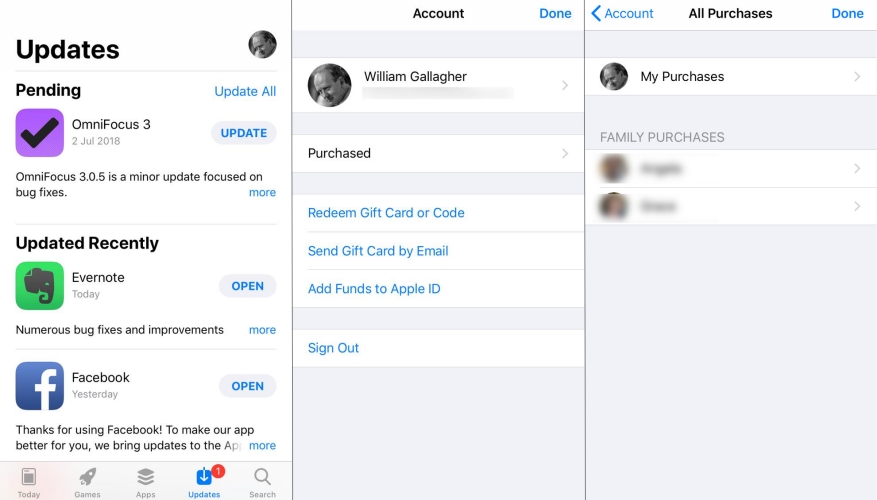
Update the App Store
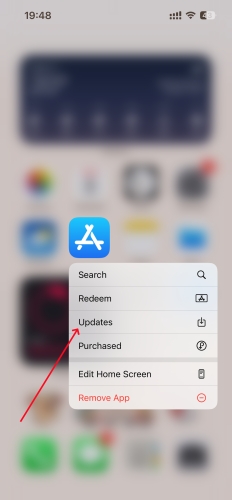
Step 1. Locate the Home screen on your iPhone and find the App Store.
Step 2. Touch and press the App Store, then tap the Update button.
Step 3. Find an update version to update and tap Update.
Solution 10. Reset Network Settings
Sometimes, you can disable and enable the internet connection on your iPhone to fix this issue. Due to the unstable network, you won't be able to download apps from the App Store. In this case, you can directly reset network settings on your device.
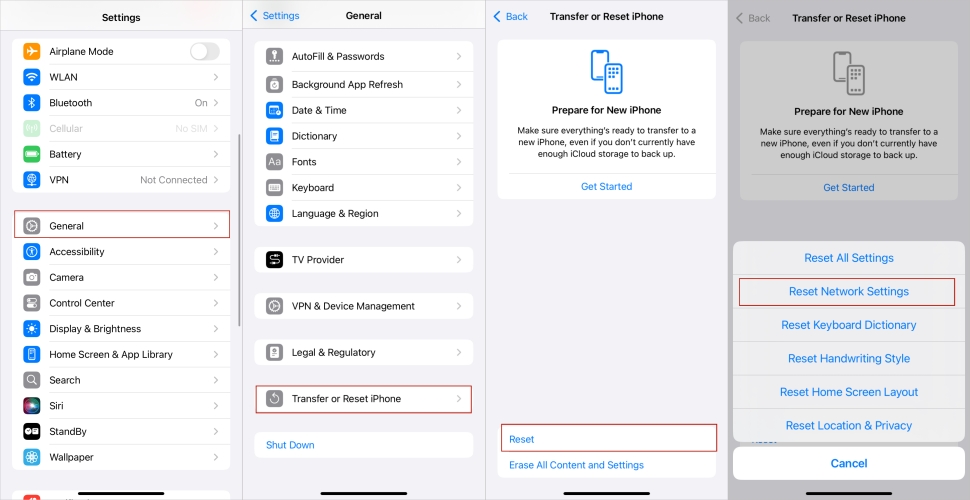
Step 1. In Settings of your iPhone, tap General and scroll down to Transfer or Reset iPhone.
Step 2. Tap Reset and select Reset Network Settings in the pop-up window.
Step 3. Enter your screen passcode and start to reset network settings on your device.
Solution 11. Contact Apple Support
If you are still facing issues, contact customer support for your iPhone's App Store can provide further assistance. You can contact Apple Support online or go to the local Apple Store. They can help you resolve account-specific problems.

Part 4. Bonus Tip: Unlink Apple ID from iPhone without Password
The last but not least is that you can unlink Apple ID from iPhone to fix Account Not In This Store after changing region. However, if you forget your password for Apple ID, then you can make use of a third-party Apple ID removal tool. For instance, MagFone iPhone Unlocker is an almighty tool that can delete Apple ID from iPhone without password. It is compatible with the latest version of iPhone, iPad, and iPod touch. By using this tool, you can quickly remove Apple ID on your device. Follow the guide below to remove Apple ID from iPhone without using the password.
Key Features of MagFone iPhone Unlocker
* Security Verified. 5,481,347 people have downloaded it.
- Unlock various screen locks like Face ID and Touch ID on all iOS devices
- Remove Apple ID from iPhone and iPad without password and data loss
- Bypass Screen Time passcode and MDM restrictions without passcode
- Support the latest version of iOS and iPadOS, as well as, iOS devices
Step 1 Link iPhone to Computer and Open MagFone

Start by connecting your iPhone to your computer via a USB cable, then launch MagFone iPhone Unlocker. On the interface of MagFone software, enter into the Unlock Apple ID mode and click the Start button to proceed the next step.
Step 2 Download and Verify the Firmware Package
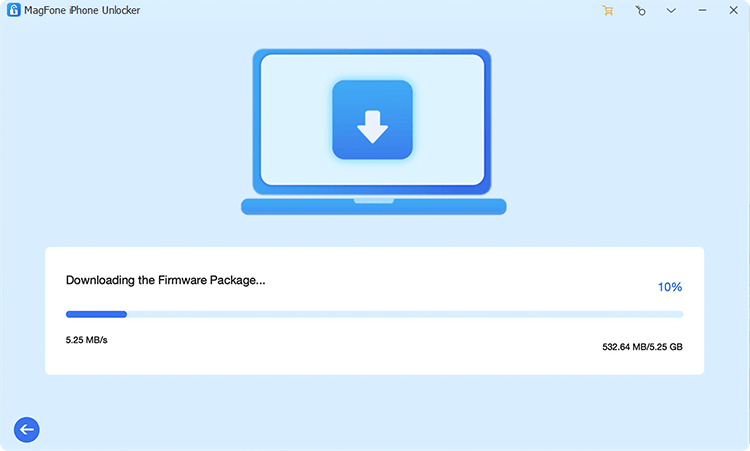
After your iPhone is detected, you need to check the device information. All the device information is shown on the interface of MagFone software. If there is nothing wrong, you can click the Download button to download the firmware.
Step 3 Remove Apple ID from iPhone without Password
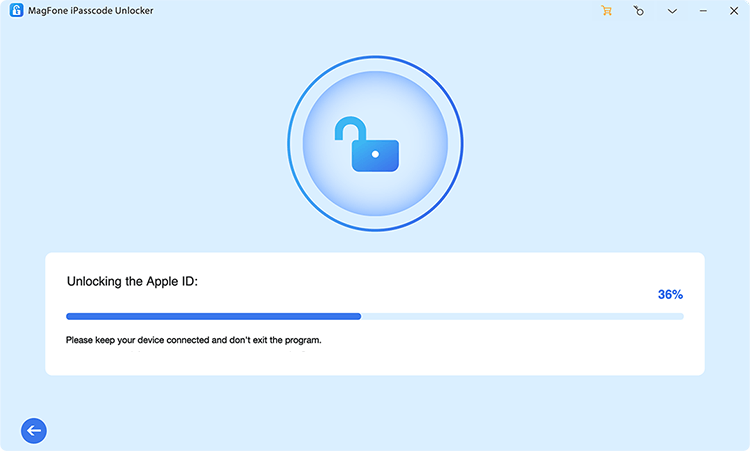
When the download is complete, click the Unlock button at the bottom right corner. Then MagFone iPhone Unlocker will quickly remove Apple ID from your iPhone. Keep your device connected to your computer until the process ends.
Part 5. Conclusion
Luckily, it doesn't take much time and effort to fix Account Not In This Store on your iPhone or iPad after trying the methods introduced in this article. If you still cannot fix this issue, you can contact Apple Support to get help. By the way, MagFone iPhone Unlocker is a great tool to remove Apple ID from iPhone, iPad, and iPod touch without password.

Teresa Miller
Editor in chief